
 Ilina Maharjan
 If you are new to Laravel, learning how to create a Laravel project is a great place to start. Laravel is a popular PHP framework that helps developers build web applications and provides useful features for managing routes, databases, authentication, and application structure.
When you start learning Laravel for the first time, creating a project provides a workspace where you can experiment with different features and understand how the framework organizes a complete application. You can begin with a basic route and gradually learn about controllers, views, models, databases, and authentication.
In this guide, we will explore how to create a Laravel project step by step. You will learn how to check that the required tools are available, create a Laravel project, open it in Visual Studio Code, start the development server, and create your first Laravel route. Finally, you will test the application in a web browser.
Prerequisites
Before starting a Laravel project, make sure your computer has the basic tools needed to run Laravel:
- PHP
- Composer
- Laravel Installer
- Visual Studio Code (optional, but recommended)
Open a terminal. This can be Terminal on macOS, a shell like bash or zsh on Linux, or PowerShell/Command Prompt on Windows, and confirm each tool is available.
Check PHP:
php -v
PHP 8.2.12 (cli) (built: Nov 24 2023 16:01:23)
Copyright (c) The PHP Group
Zend Engine v4.2.12, Copyright (c) Zend Technologies
Check Composer:
composer -V
Composer version 2.7.6 2024-05-04 23:03:15
Check the Laravel Installer:
laravel --version
Laravel Installer 5.8.2
Each command should display the installed version. If the terminal recognizes all three commands, your basic Laravel setup is ready.
Visual Studio Code is not required to create a Laravel project, but it makes development much easier. It lets you view your project folders, edit PHP files, use the integrated terminal, and work with your Laravel code in one place.
You should also have stable internet connection when you create your project. Laravel needs to download the packages and dependencies required for your application during the setup process
Step-1: Open The Terminal
Step one is creating a terminal on your machine. This can be done using either PowerShell, command prompt, or the terminal within Visual Studio Code. For windows users, start by searching for the PowerShell application from the Start Menu and open it. Or open VS Code then select Terminal > New Terminal.
The next thing is choosing the path where you would like to store your Laravel project. Using the cd command, change your directory to a folder of your choice.
macOS/Linux (bash/zsh):
cd ~
mkdir -p projects
cd ~/projects
pwd/home/yourname/projectsWindows (PowerShell):
cd $HOME
mkdir projects
cd $HOME\projects
pwd
Path
----
C:\Users\YourName\projectsFeel free to use any folder name or location you like the important part is knowing where your project lives so you can find it again later.
Keep the terminal open, since the next step creates the Laravel project from here.
Keep the terminal open since the next step is creating the Laravel project using the terminal.
Step 2: Create a Laravel Project
After opening the terminal and setting the location of your project, you will be able to create a new Laravel to achieve this.
Run:
laravel new my-laravel-projectYou are allowed to use any name you want instead of my-laravel-project. For instance, you can choose my-blog, student-portal, or any other name that suits your project.
Creating a "laravel/laravel" project at "./my-laravel-project"
Installing laravel/laravel (v11.8.0)
Created project in ~/projects/my-laravel-project
> @php -r "file_exists('.env') || copy('.env.example', '.env');"
> @php artisan key:generate --ansi
Application key set successfully.
As soon as you execute the command, Laravel proceeds to create your project needs. Laravel will create the project directory and install the necessary packages. This takes some time, so do not interrupt your internet connection.
After the installation finishes, move into your project folder:
cd my-laravel-projectYour Laravel application now exists on your computer. You can open it in Visual Studio Code and begin exploring the project files.
Step 3: Open the Project in VS Code
Now that you have your Laravel project ready, open it up in Visual Studio Code. VS Code is an excellent tool to help you organize your Laravel project.
First, make sure your terminal points to the project folder:
cd my-laravel-projectThen open it in VS Code:
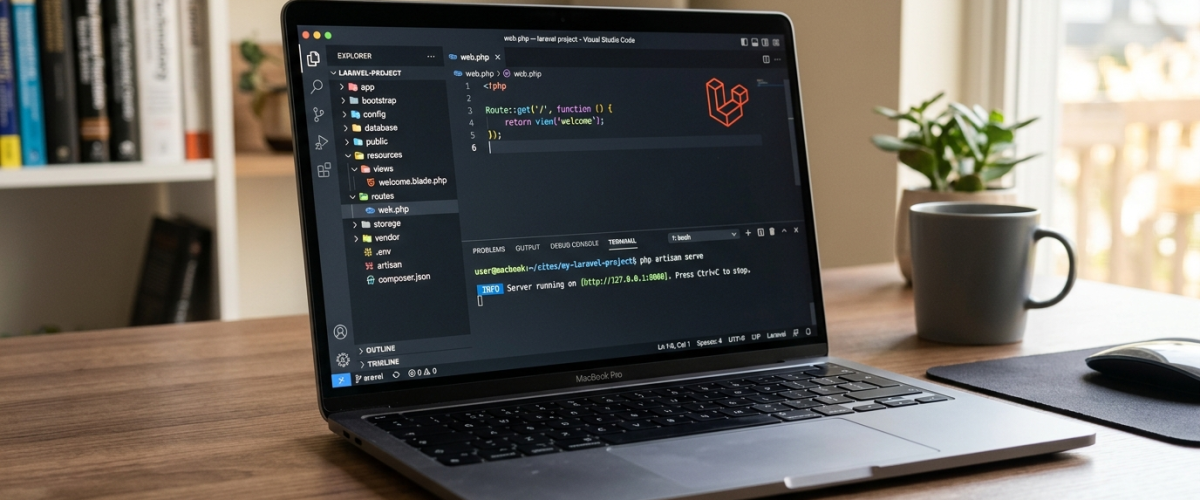
code .The code . will instruct VS Code to open the current directory. The IDE should now display your Laravel project in the Explorer window. There will be various directories, namely app, routes, resources, and database. These directories have distinct roles, whereas the routes directory will hold routes files of your application. Resources will hold views and frontend resources, and database will have database-related files.
You don’t need to understand every single directory at once. Spend some time browsing through the project structure and getting acquainted with files. This will allow you to work within the Laravel application and not any other directory.
Step 4: Learn About Laravel Folder Structure
Laravel groups files by purpose, which makes it easier to manage your application as it grows:
- app/ — core application files, including controllers and models. Controllers handle application logic; models help your app interact with the database.
- routes/ — route definition files. routes/web.php is the most important one for beginners, since it defines the pages users will see.
- database/ — migration, seeder, and factory files. Migrations create and modify database tables through code.
- public/ — files accessible to website visitors; this is also the entry point for web requests.
- config/ — configuration files for the application.
- storage/ — application-generated files and logs.
- vendor/ — installed packages managed by Composer.
STEP 5: Start the Laravel Development Server
Once you have opened your Laravel application, you can use Laravel’s development server to start testing the application from your computer before deploying it to the internet.
Open the terminal in VS Code and make sure you are inside your project folder:
cd my-laravel-projectThen run:
php artisan serveINFO Server running on [http://127.0.0.1:8000].
Press Ctrl+C to stop the server
The command line interface for Laravel is Artisan. Artisan gives you several commands to work with your Laravel application. Serve is one of the commands used to start the local development server.
After running the command, the terminal will display a local address, usually:
http://127.0.0.1:8000
Enter this URL on your web browser. You will be able to see your Laravel application. This server will keep running as long as the terminal process is sunning. You can end this process by pressing CTRL+C on your terminal.
You can run this server while developing your application. When you make any change in your Laravel application, refresh the page on your web browser to see the effects.
Step 6: Create Your First Laravel Route
You can now proceed to create your Laravel route. The route is used by Laravel to define how it will handle certain URLs.
Open routes/web.php file in VS Code:
<?php

use Illuminate\Support\Facades\Route;

Route::get('/', function () {
         return 'Welcome to Laravel!';
});
The “/” denotes the index page of your web application. When the index URL is visited, Laravel executes the function and outputs the text “Welcome to Laravel!”
Save the file and return to your browser and refresh. Open:
http://127.0.0.1:8000
Refresh the page. You should now see:
Step 7:Test Your Laravel Application
Once you’ve created your route for the first time, proceed to testing your application. Start by ensuring that the Laravel development server is running in your terminal.
Open your browser and visit:
http://127.0.0.1:8000If everything works correctly, you should see:
Welcome to Laravel!
Then try the /about route you added earlier:
http://127.0.0.1:8000/aboutYou should see the message from that route. Getting into the habit of testing your app after each change helps you catch issues early and builds familiarity with how Laravel handles requests.
Common Problems and Solutions
Some issue s that beginner developers can encounter while developing their first Laravel application include on that is associated with recognizing PHP in the terminal.
You can check PHP by running: php -v
In case it does not work, verify the installation of PHP and environment variables. This error appears when the Laravel command is not recognized by the terminal. Verify the Laravel Installer using:
laravel –version
You may even attempt to execute an Artisan command from the incorrect directory. If the command fails, check whether you installed the Laravel Installer correctly.
Make sure you enter your Laravel project directory first:
cd my-laravel-project
Then run:
php artisan serve
If your browser cannot connect to 127.0.0.1:8000, ensure that the development server is running in your terminal. You may also inadvertently open the wrong directory in VS Code. Verify that the project name in the Explorer pane is correct.
Once you receive an error, examine the error message carefully. The Laravel and PHP frameworks typically provide valuable clues to help you pinpoint the source of the problem. It is always preferable to fix the problem rather than reinstall everything.
Conclusion
Once you have knowledge of the basic steps to follow, creating a Laravel project becomes a simple process. You begin by installing PHP, Composer, and Laravel installer. Once all these have been installed, you launch a terminal and create a project using the Laravel new command.
Once Laravel has created your project, you will be able to view it in Visual Studio Code and analyze its folder structure. These include folders like app, routes, resources, and database.
You can then start the Laravel development server using:
php artisan serve
This allows you to run and test your application locally. After that, you can create your first route inside routes/web.php and display a simple message in your browser. Following these steps will help you create good foundation to start developing using Laravel. After understanding the basics, you may proceed to learn about controllers, Blade views, models, migrations, databases, forms, authentication, and APIs.
It is always recommended that one learns Laravel by practicing regularly. It is best to begin with similar projects before moving on to bigger ones.
Related Questions
What do I need installed before creating a Laravel project?
You need PHP, Composer, and typically a local development environment like Laravel Herd, XAMPP, or Valet, along with a database such as MySQL if your project will store data.
What is the easiest way to create a new Laravel project?
The easiest way is to use Composer’s create-project command, or the Laravel installer, which sets up a fresh Laravel application with all the necessary folders and configuration files.
What is the purpose of the .env file in Laravel?
The .env file stores environment-specific configuration, such as database credentials and application settings, keeping sensitive information out of your main codebase.
Do I need to know PHP well before learning Laravel?
Basic PHP knowledge helps, since Laravel is a PHP framework, but many beginners learn core PHP concepts alongside Laravel as they build their first project.
What should I learn after creating my first Laravel project?
After your first project, it helps to learn routing, controllers, Eloquent models, Blade templates, and migrations, since these are the building blocks used in almost every Laravel application.
 Rohan
Rohan 
 Manish Basnyat